Create and Manage Bundles
This guide walks you through creating, editing, and managing bundles in BundlesIQ.
BundlesIQ operates variant-to-variant. Shopify Admin often talks in “products,” but BundlesIQ detects and maps using variant IDs.
What You Will Accomplish
You will:
- Create a bundle by linking a ghost SKU variant (the bundle item customers buy) to component variants
- Configure pricing and (optional) constraints
- Configure (optional) inventory/retail sync settings
- Activate the bundle and run the built-in Test Bundle flow
Before You Begin
Your component variants already exist in Shopify (BundlesIQ can create the ghost SKU item in-app, but components must exist in Shopify)
You have a basic idea of your store’s default:
- Handling mode (Operational / Hybrid / Reporting / Parent-Only (BOM))
- Pricing mode (Bundle-Led / Component-Led)
Step 1: Open the Bundle Creator
- Navigate to BundlesIQ > Bundles in your Shopify Admin sidebar
- Click Create Bundle (top-right)
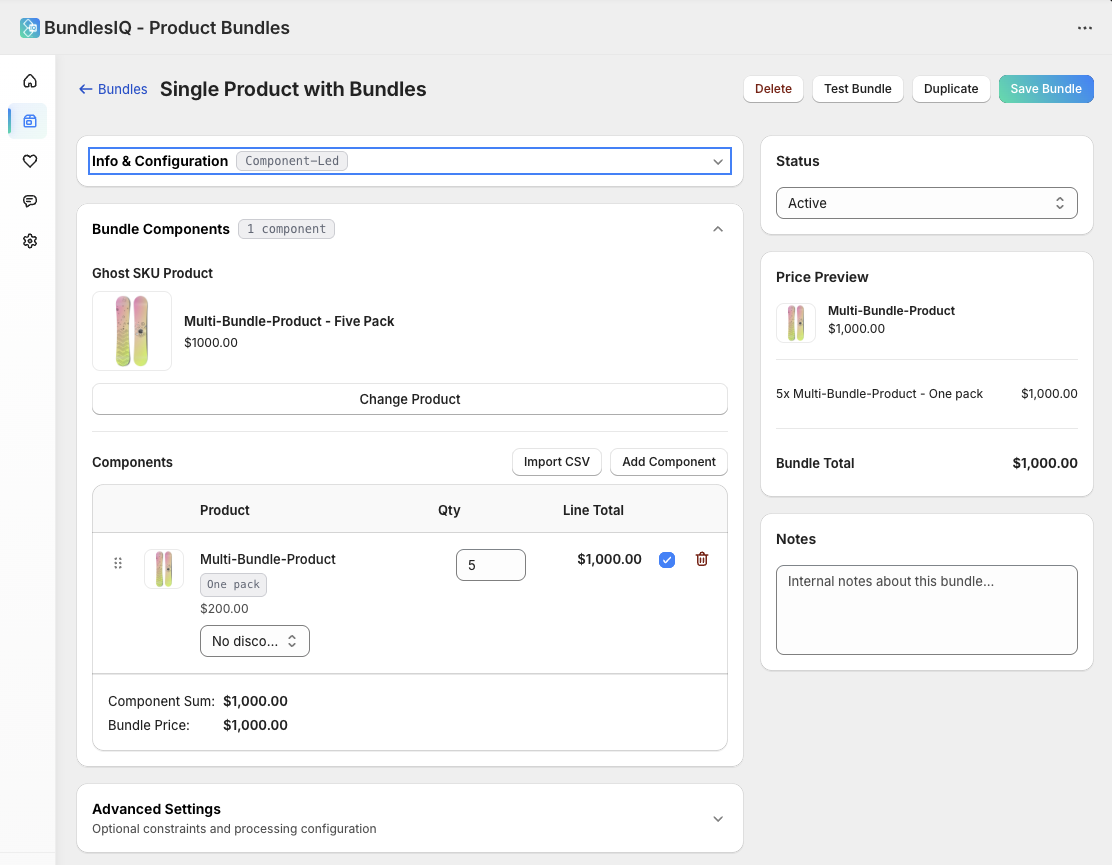
Step 2: Configure Bundle Info & Defaults
In the Info & Configuration card:
Give the bundle a name
- Internal reference only (recommended: similar to the ghost SKU item name)
(Optional) Pricing Mode
- Defaults to your shop’s default (collapsed section; can be overridden per bundle)
(Optional) Handling Mode
- Defaults to your shop’s default (collapsed section; can be overridden per bundle)
Step 3: Select or Create the Ghost SKU Variant + Add Components
All bundle composition happens in the Bundle Components card.
3A) Select or create the Ghost SKU variant
The ghost SKU variant is the bundle variant customers purchase.
Choose one:
- Select Product From Shopify → pick an existing Shopify variant, or
- Create New Item → create the bundle item from inside BundlesIQ (fastest path)
Note: SKU is optional. BundlesIQ identifies items by variant ID, not SKU.
3B) Add components
Components are the individual variants included in the bundle.
You can add components two ways:
Option 1: Add Components (search + add)
- Click Add Components
- Search and select a component variant
- Set the Quantity per bundle
- (Optional) Mark as Required
- Repeat for each component
Option 2: Import CSV (bulk append)
Click Import CSV
Download the template
Paste one identifier per line into
identifier:- SKU, barcode, variant ID, or Shopify GID
Enter the per-bundle quantity in
quantity- Defaults to 1 if omitted

Component fields:
| Field | Description |
|---|---|
| Variant | The Shopify variant to include |
| Quantity per bundle | Units included per bundle (e.g., 2 if the bundle contains 2 of this component) |
| Required | If enabled, staff cannot remove this component during adjustments |
| Sort order | Controls display order in the bundle editor |
Step 4: Configure Pricing
BundlesIQ supports different pricing strategies depending on your Pricing Mode and Handling Mode.
Pricing Modes
Bundle-Led
- The ghost SKU variant price is the bundle price customers pay.
- BundlesIQ allocates that bundle price across components during transformation.
Important constraint (avoid impossible allocations):
The sum of component retail values (qty × price) must be >= the bundle price.
- Reason: you can reliably discount/allocate down; you can’t reliably “increase” a component’s effective price beyond its retail.
Component-Led
Component pricing is defined at the component level using options like:
- No Discount
- Percent Off
- Amount Off
- Fixed Price
Fixed Price constraint:
- Fixed Price must be <= the component’s retail price.
Parent-Only (BOM) note
If your handling mode is Parent-Only (BOM):
- The order typically does not expand into component line items
- Pricing is treated differently (cost/profit/margin workflow)
Step 5: Set Constraints (Optional)
Constraints limit how staff can adjust components on a specific order (when your workflow allows staff adjustments).
| Constraint | Description | Example |
|---|---|---|
| Total quantity required | Total units across all components must equal this value | A 24-unit case pack must always total 24 units |
| Max component delta | Max deviation allowed per component from its default quantity | A component can deviate by up to 10 units |
Leave constraints empty if you don’t need restrictions.
Step 6: Add BOM Cost Lines (Parent-Only Mode Only)
If the bundle uses Parent-Only (BOM) handling mode, you can add cost lines for internal tracking:
- Scroll to BOM Cost Lines (only visible in Parent-Only)
- Click Add Cost Line
- Enter a Name and Amount
| Field | Description | Example |
|---|---|---|
| Name | Cost label | “Labor”, “Overhead”, “Packaging” |
| Amount | Dollar cost | $5.00 |
BOM cost lines are internal-only. They do not appear on the Shopify order or change what customers pay.
Step 7: Advanced Settings (Optional)
In the Advanced Settings card you may see options such as:
- Sync Bundle Inventory
- Sync Bundle Retail (commonly relevant for Component-Led setups)
- Storefront UI (e.g., “What’s Included” display on product page)
Inventory tracking reality (important)
If you enable Sync Bundle Inventory, the ghost SKU variant must have inventory tracking ON in Shopify.
If you want Shopify to prevent overselling the bundle variant:
- Track inventory ON
- “Continue selling when out of stock” OFF
- Then let BundlesIQ sync availability based on component availability (if enabled)
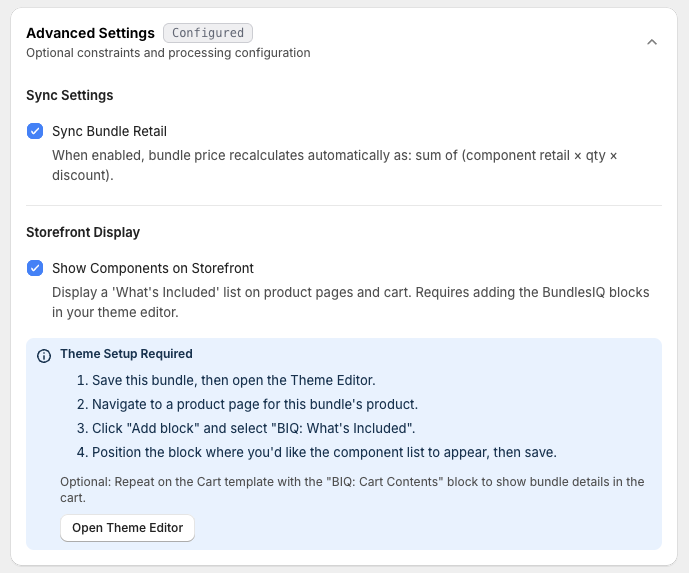
If you enable Show Components on Storefront, you'll need to add the BundlesIQ theme block to your product page template:
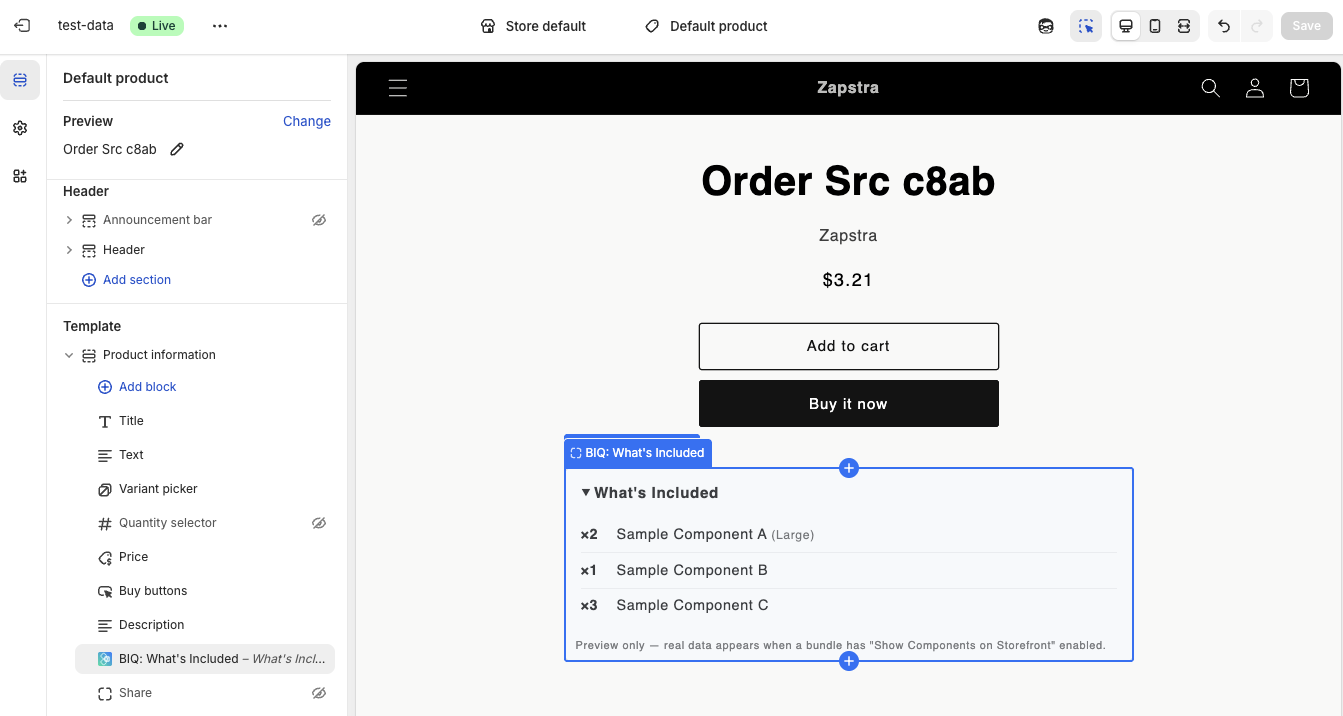
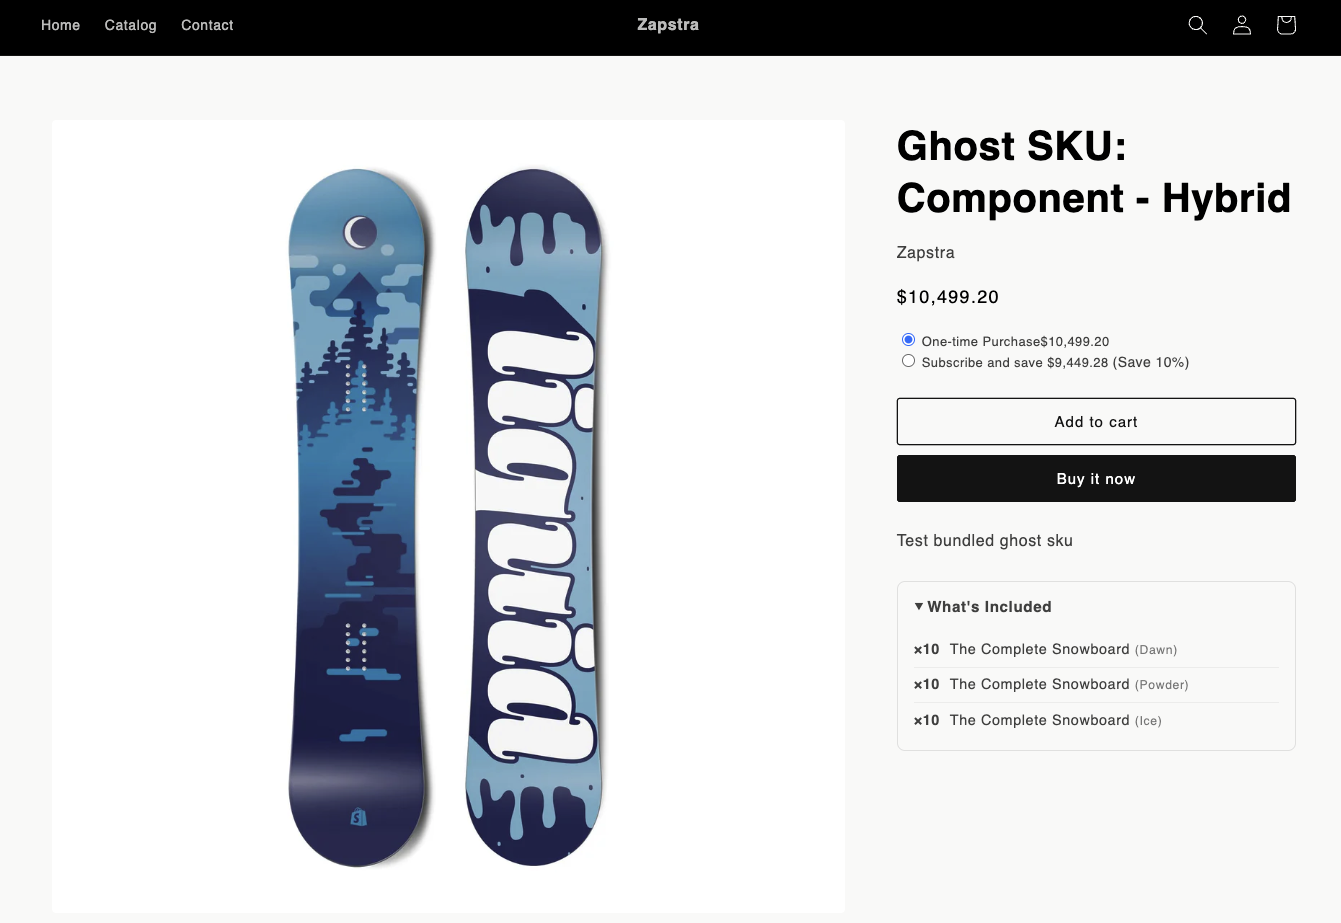
Once configured, customers see the bundle's component list on the product page:
For step-by-step instructions on adding the product page and cart blocks through the Shopify theme editor, see Storefront Blocks.
Step 8: Review, Save, and Activate
- Review the summary (including any pricing/validation warnings)
- Set status to Active if you want BundlesIQ to begin processing orders for this bundle
- Click Save
Step 9: Test the Bundle (Recommended)
After saving and activating, click Test Bundle at the top of the bundle page.
The test runs a safe validation flow to confirm processing works end-to-end.
High-level, Test Bundle:
- Creates a draft order (validates webhook reception + pipeline)
- Verifies transformation output matches your configuration
- Verifies bundle metadata/metafields were written
- Deletes the draft order (keeps your store clean)
Bundle Statuses
| Status | Meaning |
|---|---|
| Active | BundlesIQ will detect and process orders containing this bundle’s ghost SKU variant |
| Inactive | Bundle is preserved but BundlesIQ will not process orders for it |
| Draft | Bundle is being configured and is not ready for processing |
| Archived | Bundle is hidden from the main list and treated as no longer in use |
Editing an Existing Bundle
- Navigate to BundlesIQ > Bundles
- Click the bundle you want to edit
- Make changes (components, pricing, constraints, settings)
- Click Save
- Run Test Bundle to confirm everything still transforms as expected
By default, configuration changes apply to new orders. Previously processed orders are not retroactively modified unless you explicitly reprocess.
Common Mistakes
- Selecting the wrong variant — If a product has multiple variants (sizes, colors), select the correct variant for both the ghost SKU and components
- Forgetting to set the bundle to Active — Draft/Inactive bundles won’t process orders
- Misconfigured inventory expectations — Sync Bundle Inventory requires inventory tracking ON for the ghost SKU
- Not running Test Bundle after changes — Always run Test Bundle after editing to catch issues before customers do